Phoenix Firmware Update Instructions

PHOENIX FIRMWARE UPDATE INSTRUCTIONS

Rev. A 02/06/2023
Document Overview
The purpose of this document is to outline specific details needed for the proper completion of Firmware updating utilizing our Phoenix tools program.
Scope
The scope of this document is to define and lay out all instructions in sequential order for the completion of a firmware update using our Phoenix tools program. It is the responsibility of the technician performing this procedure to follow the steps, instructions, and inspection requirements as stated in this document.
Required Equipment, Tools and Supplies
Firmware update Instructions
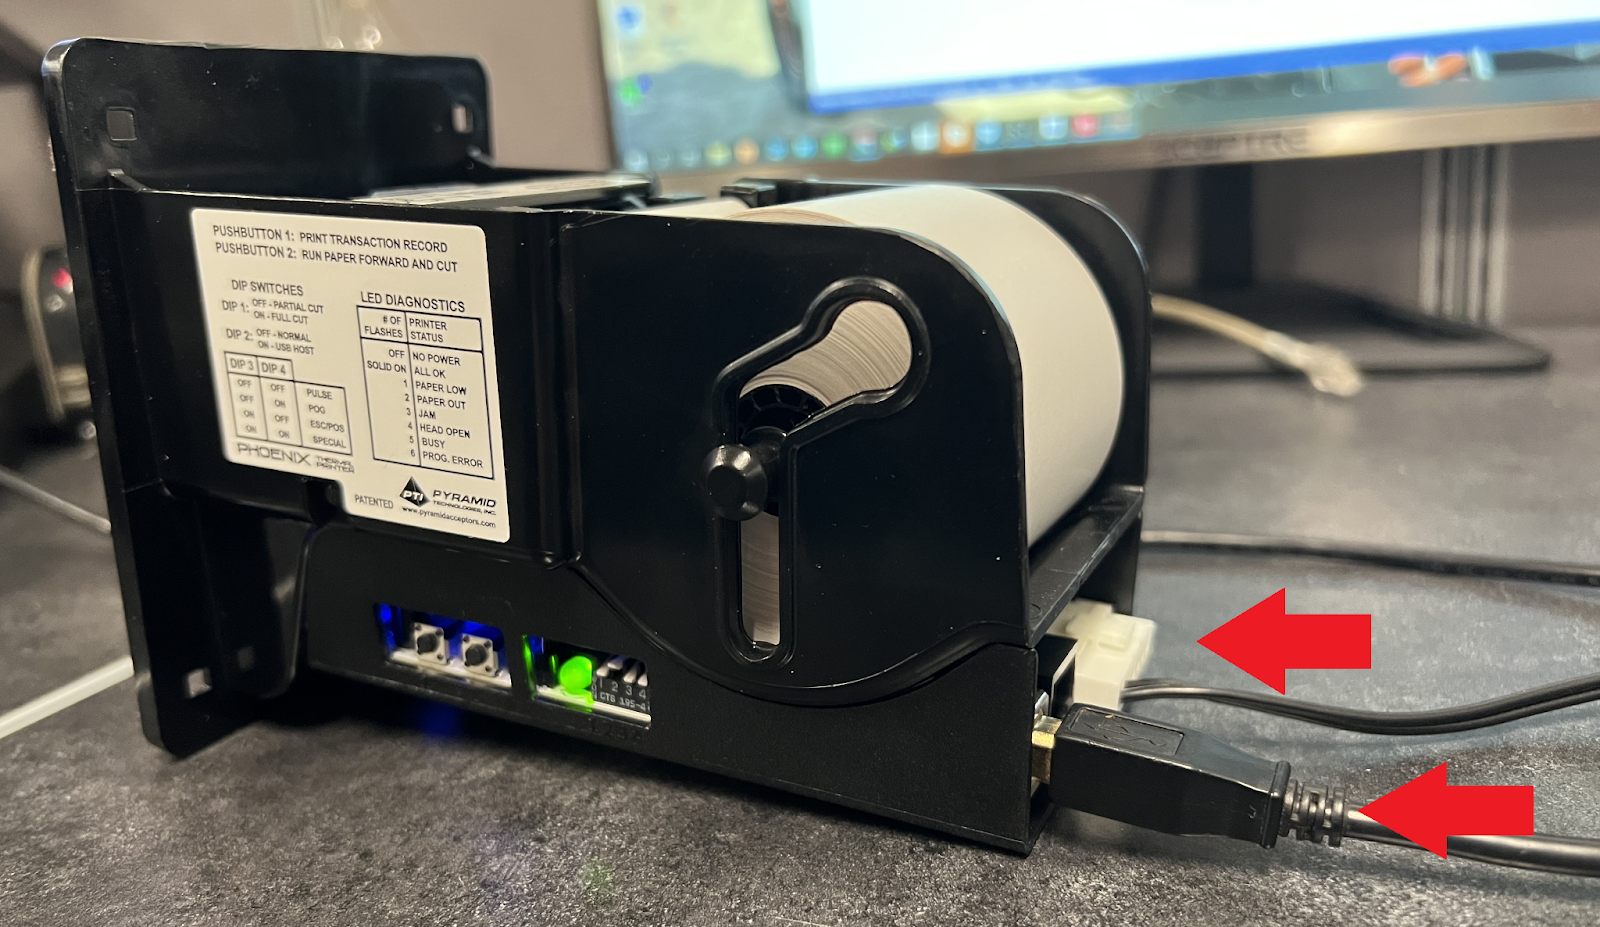
Step 1.
With the power applied to the printer please plug in the USB cord and open the Phoenix tools as seen in the image below.
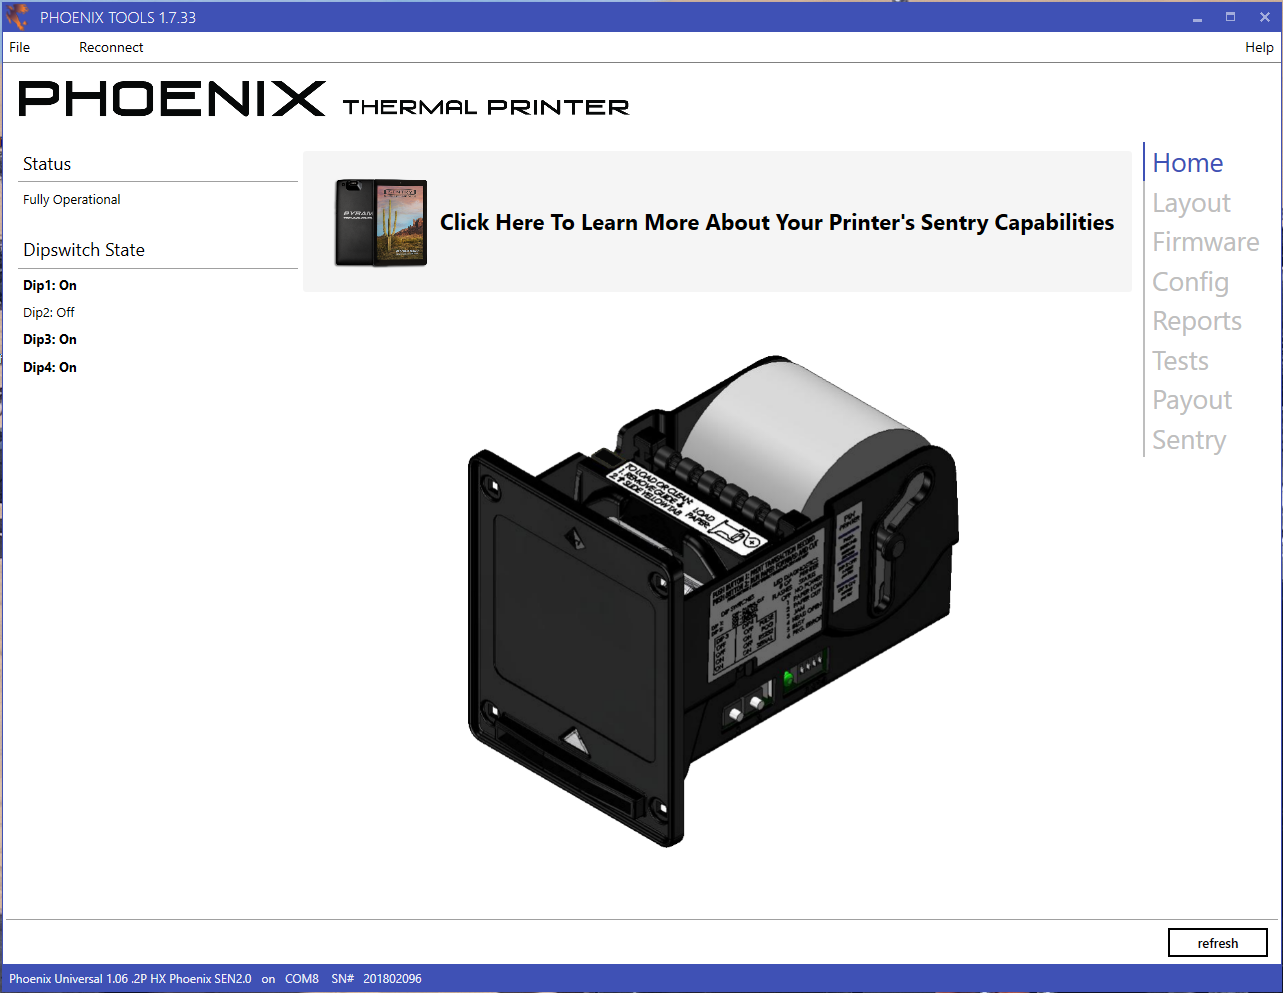
Step 2.
Once power has been applied and you are connected to the Phoenix tools please select “Firmware” as seen in the image below.
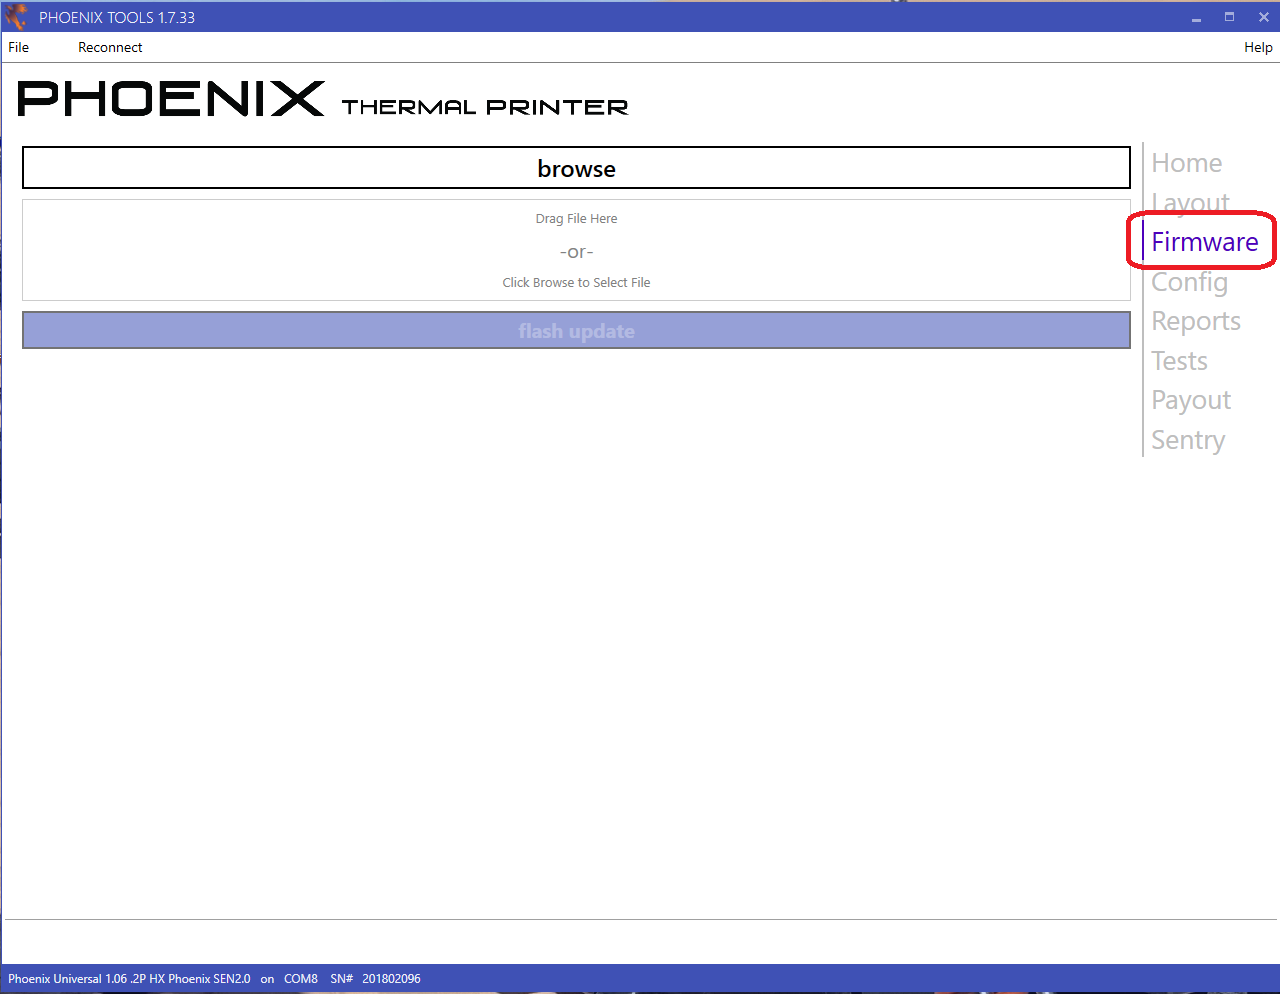
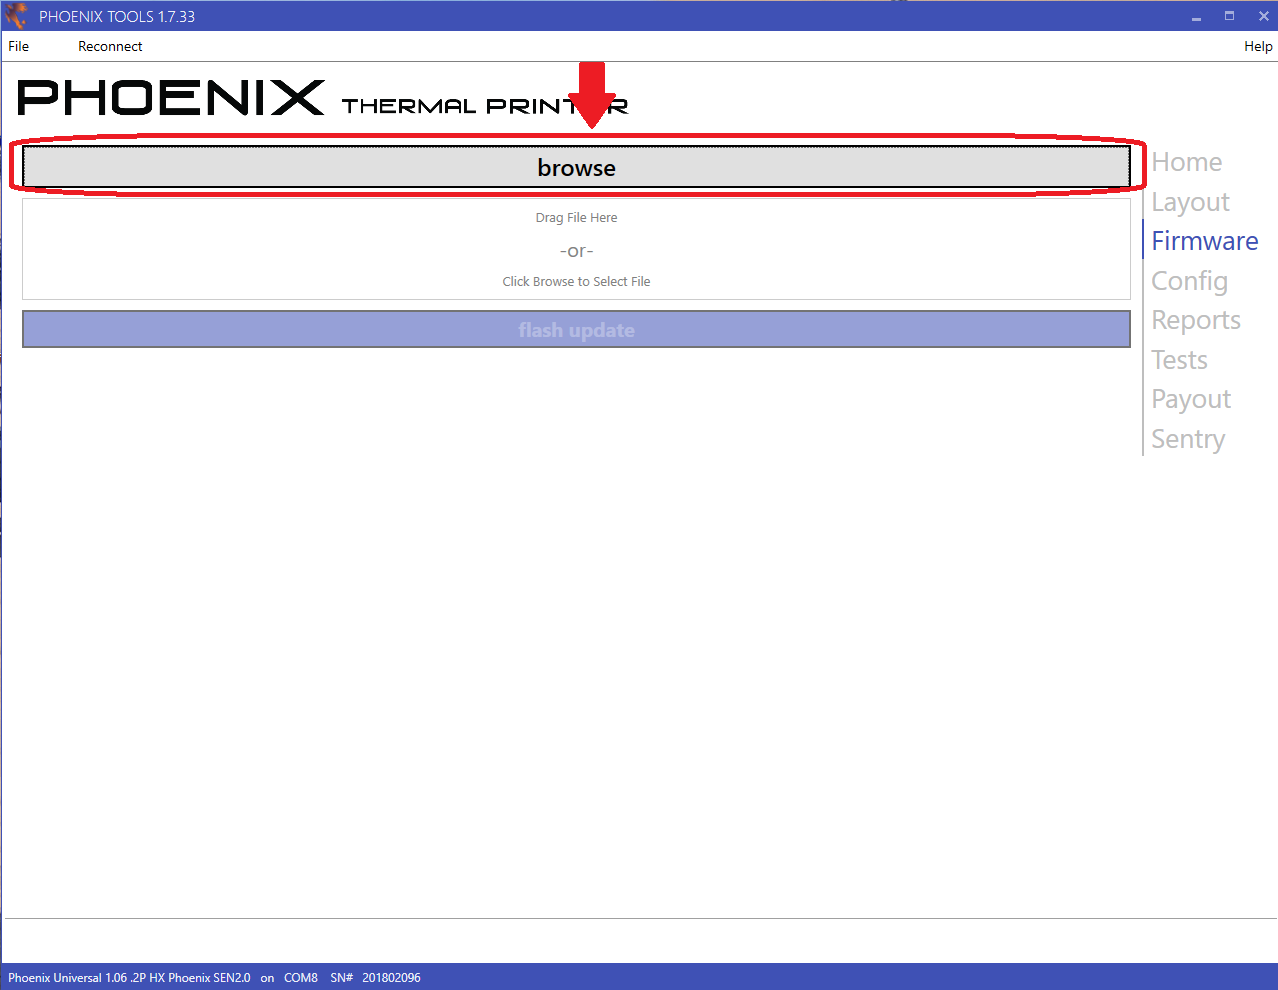
Step 3.
Now that you are at the Firmware screen please select the “Browse” button as shown below.
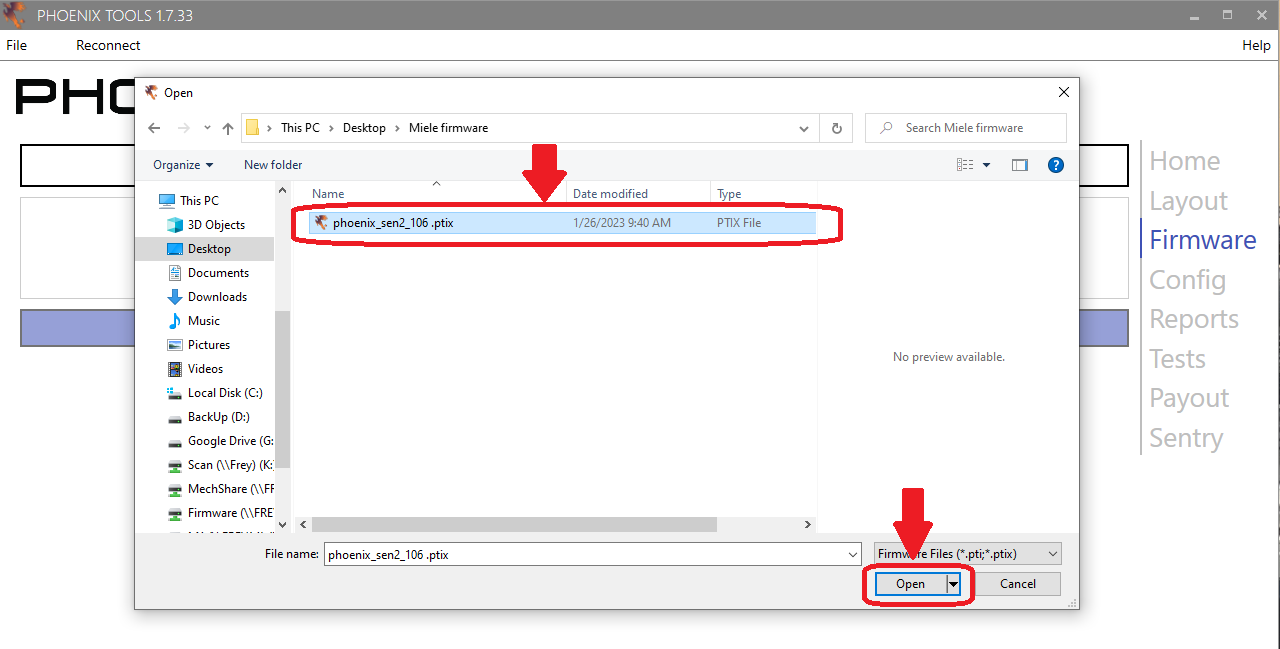
Step 4.
Once “Browse” has been selected you will then locate the firmware file needed to flash update to and hit “Open” as seen in the image below.
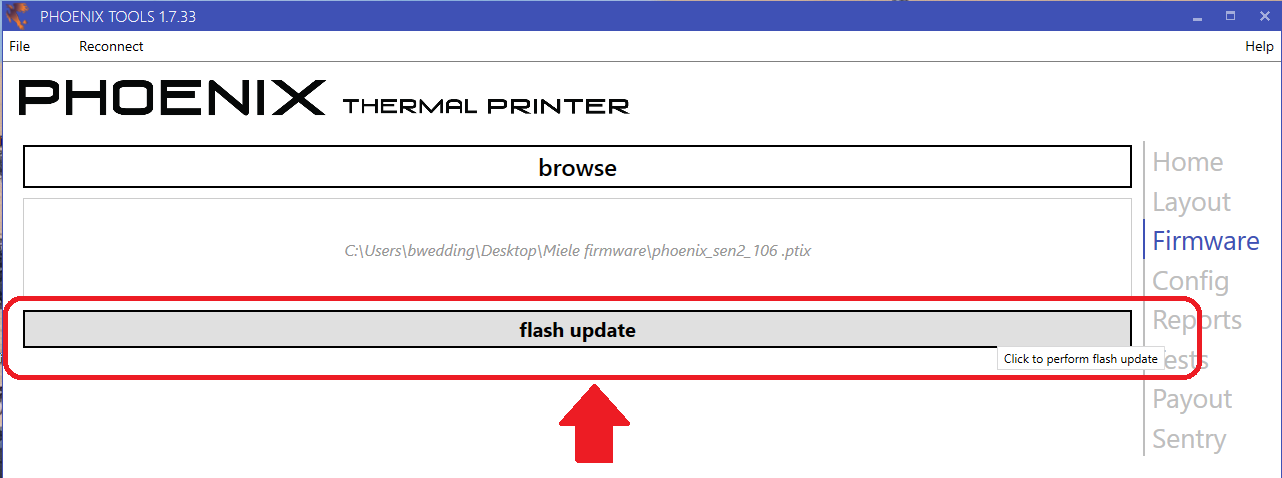
Step 5.
Once “Open” is selected you will be back to the Firmware screen. In that screen, you will see the selected firmware identified in the box below the “browse” button. From this point all you will need to do is select the “flash update” button and the flash update will begin. Please see the image below. This will take about 30 seconds to complete.
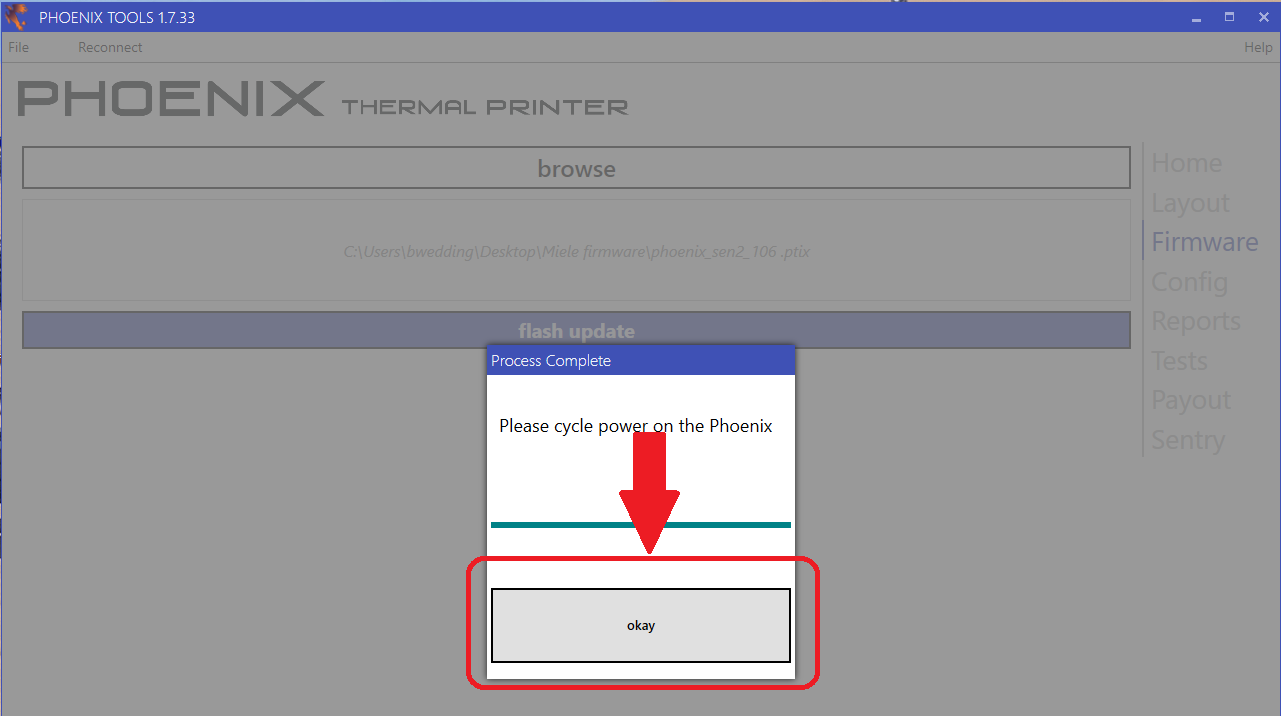
Step 6.
With the flash update complete you will see a box signaling to “Please cycle power on the Phoenix”. Please select “okay” to close as seen below.
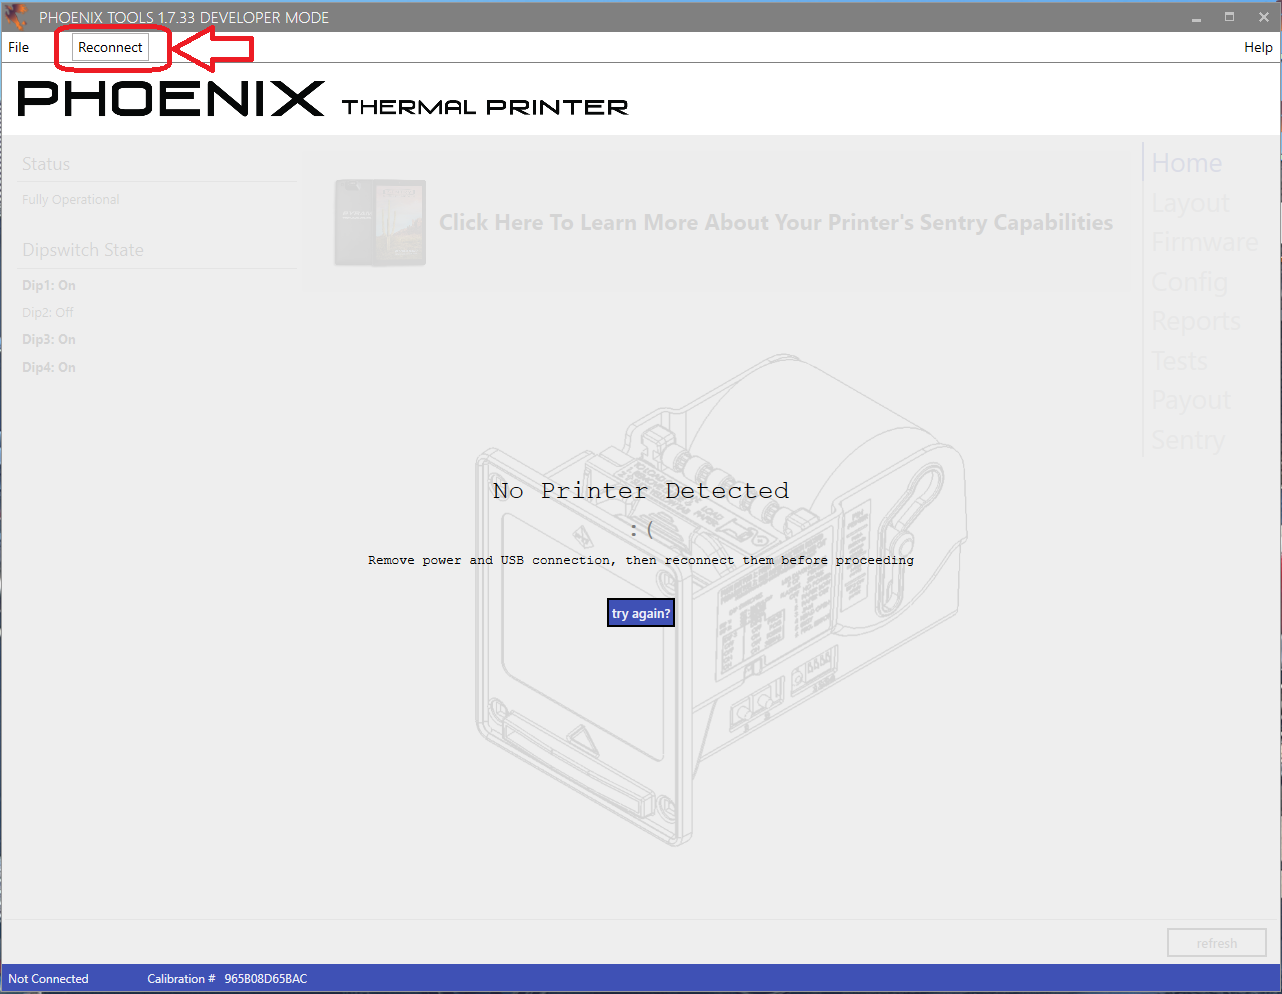
Step 7.
With that box now closed please select “Reconnect” at the top left of the Phoenix tools program as seen below.
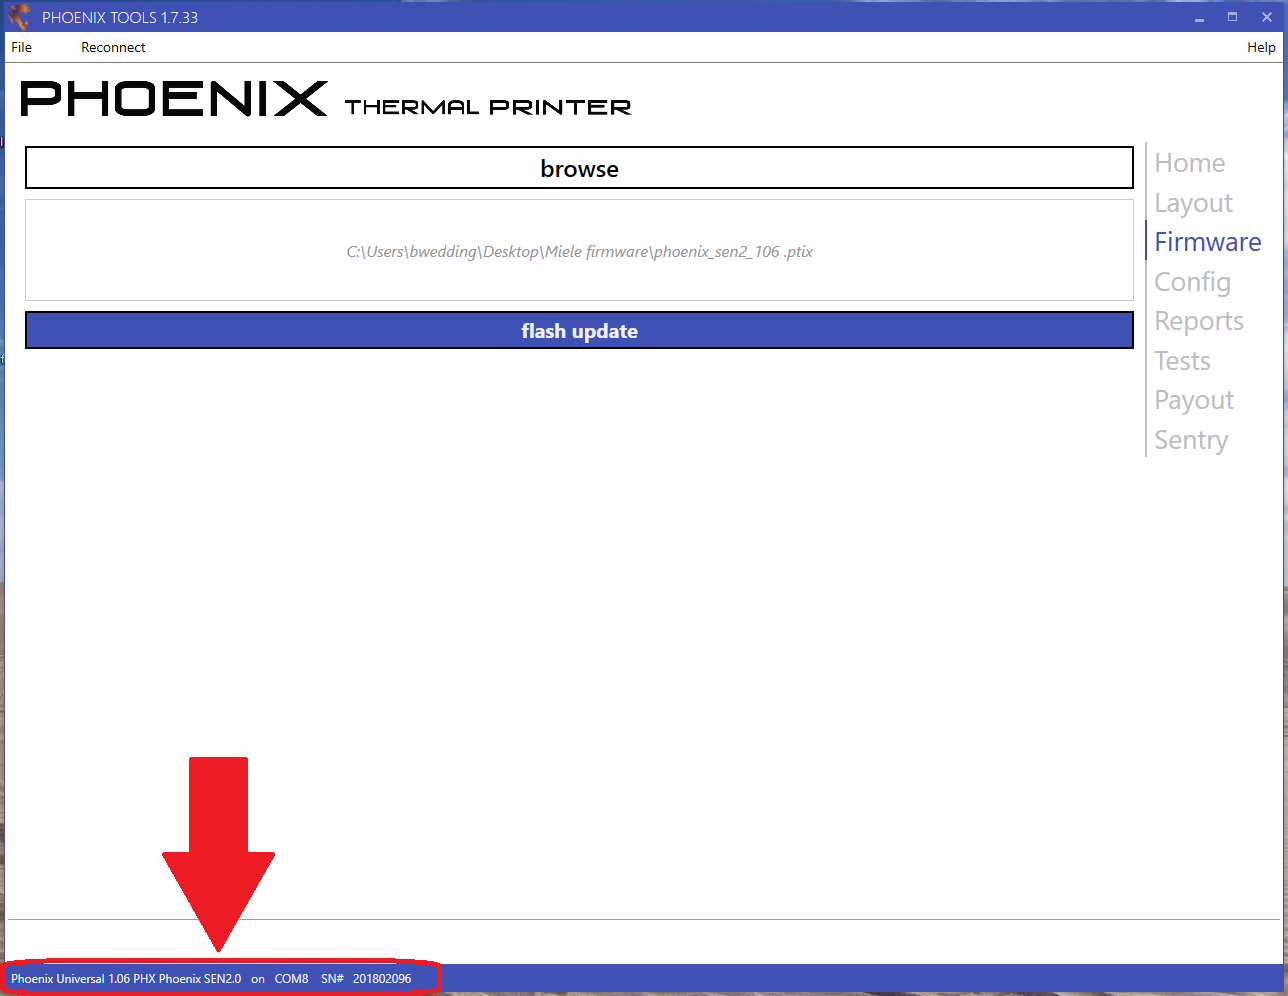
Step 8.
After you have selected “Reconnect” at the top right of the Phoenix tools you can now verify the new firmware and revision installed at the bottom of the screen as seen below. If you have multiple printers you can then repeat steps 5 through 7 without having to close the Phoenix tools program.
Related Articles
Apex 7000 Firmware Update Instructions
APEX 7000 FIRMWARE UPDATE INSTRUCTIONS www.pyramidacceptors.com Rev. A 10/30/2024 Document Overview The purpose of this document is to outline specific details needed for proper firmware updates of an Apex stacker bill acceptor. This document should ...Phoenix / Banilla Game, Serial Printer Configuration Instructions
The Phoenix thermal printer is now fully compatible with all Banilla game platforms via serial communication. Our new SEN02 firmware gives you full serial compatibility with a few extra advantages. Larger bold text, shorter ticket length to conserve ...Phoenix Cleaning Instructions
CLEANING INSTRUCTIONS www.pyramidacceptors.com Rev. A 7/6/17 Document Overview The purpose for this document is to outline specific details needed for the proper completion of preventative maintenance cleaning. Scope The scope of this document is to ...Phoenix UNV/SEN2 Thermal Printer Configuration
Phoenix UNV/SEN2 Thermal Printer Configuration About The Phoenix Thermal printer by Pyramid Technologies provides a wide range of features that can reliably serve many types of markets. The latest series of firmware for the Phoenix Printer is called ...Phoenix Configuration File Loading Instructions
Using an attached configuration file needed specific to your game terminal application please download it and save it to the desktop Windows PC. Once you have that done please follow the steps detailed below using the installed Phoenix tools program ...